

Stable Diffusion 硬件要求
Automatic1111 安装流程 (Windows)
1.进入python 3.10.6下载地址,下载python 3.10.6版本,进行安装,有网友问为什么不是更新的版本,主要是为了程序兼容性。
Python 3.10.6下载链接地址:Python Release Python 3.10.6 | Python.org
2.下载安装Git
Git官网下载链接地址:Git for Windows
3.复制Automatic1111代码地址,利用Gitf进行clone安装
Automatic1111下载链接地址:AUTOMATIC1111/stable-diffusion-webui: Stable Diffusion web UI (github.com)
打开Automatic1111下载地址,单击Code将Https地址进行复制

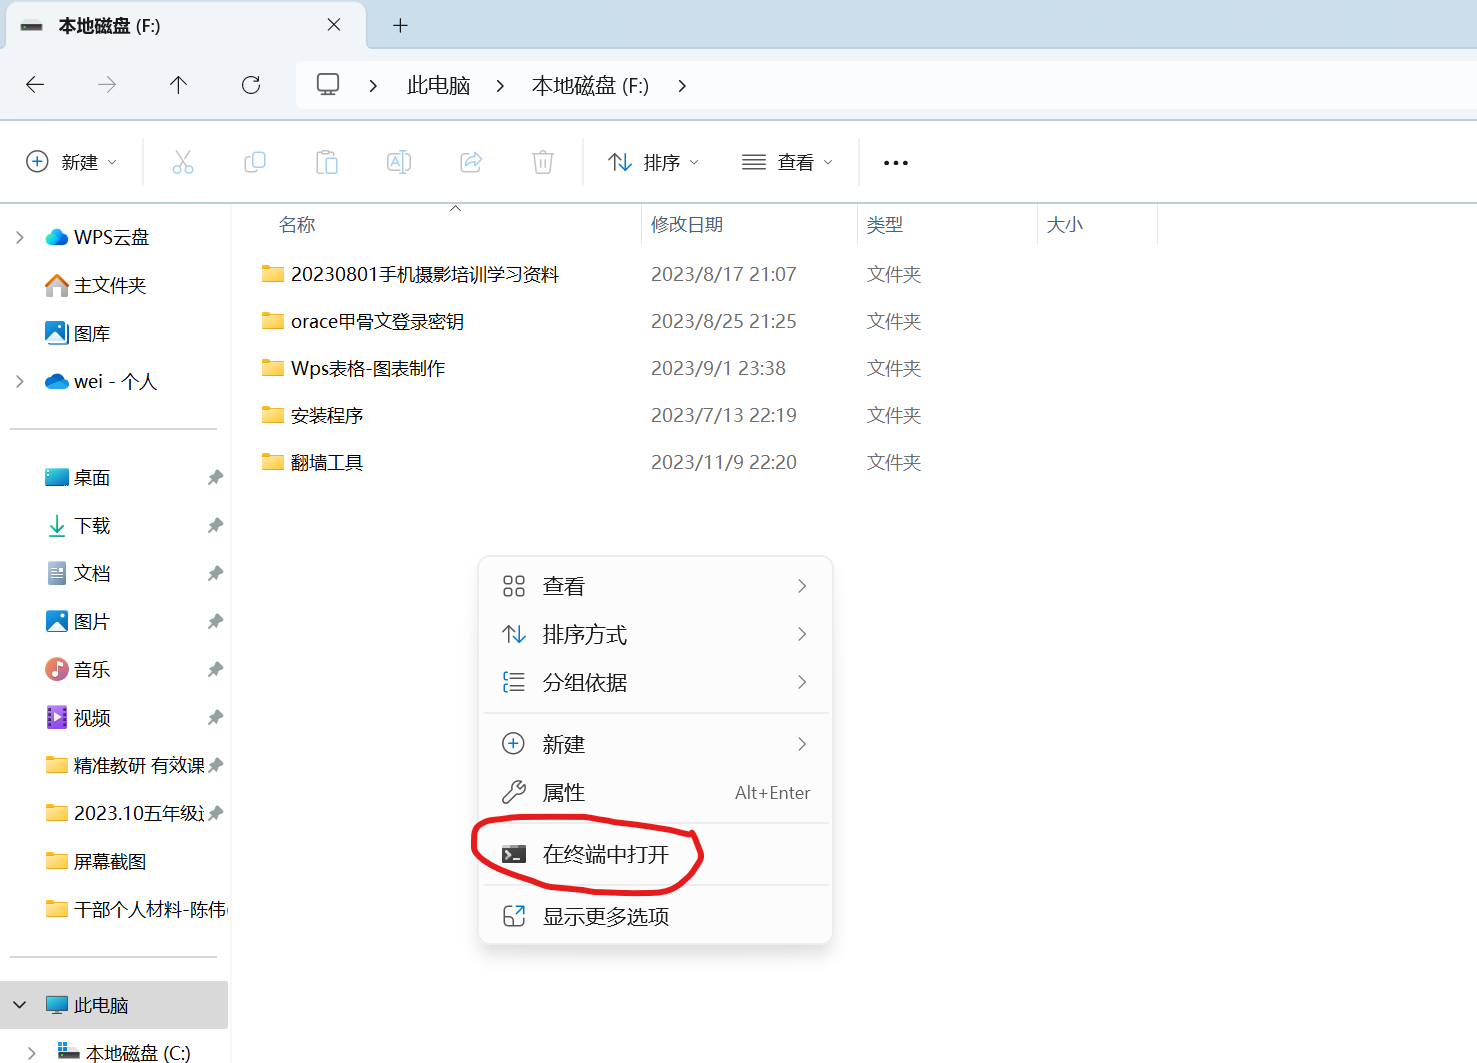
接下来我们确定一下Stable Diffusion安装在硬盘的位置,我这里选择F盘,右击选择”在终端中打开“
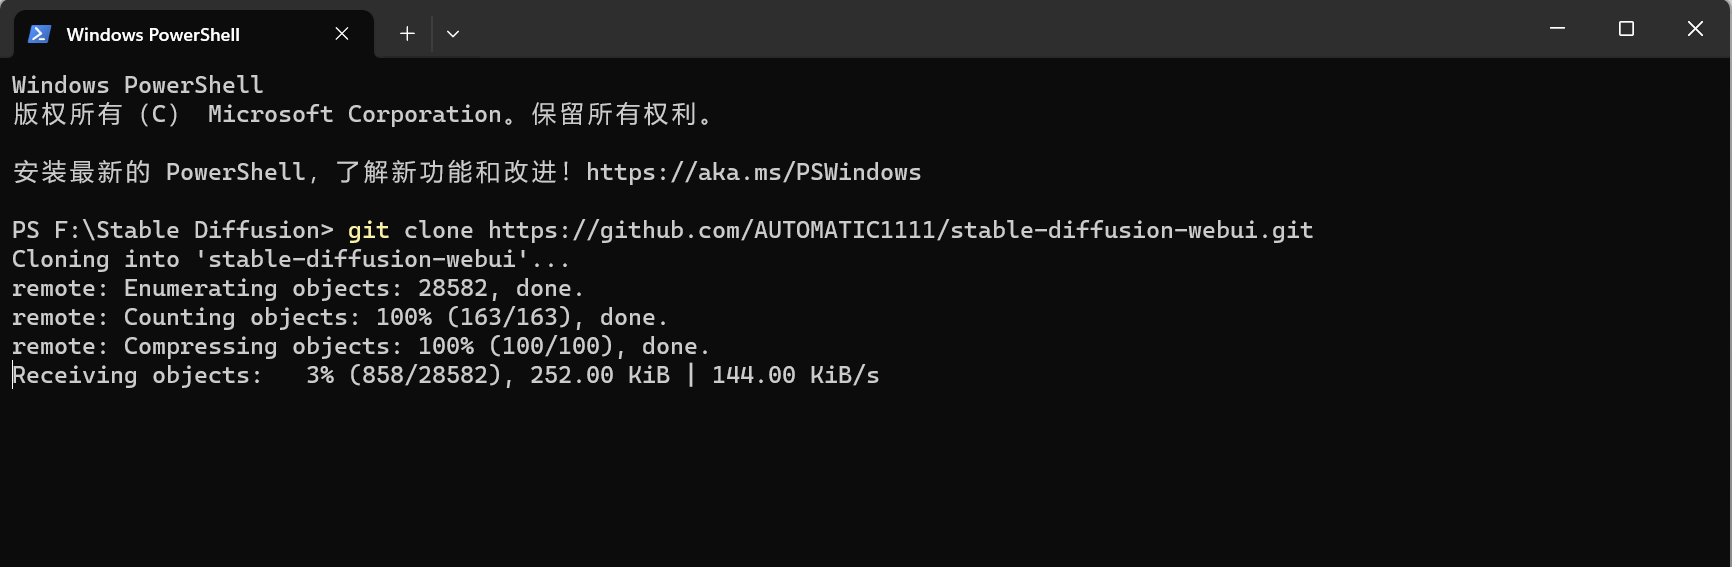
在终端中输入命令:git clone https://github.com/AUTOMATIC1111/stable-diffusion-webui.git
这时就会下载Automatic1111程序
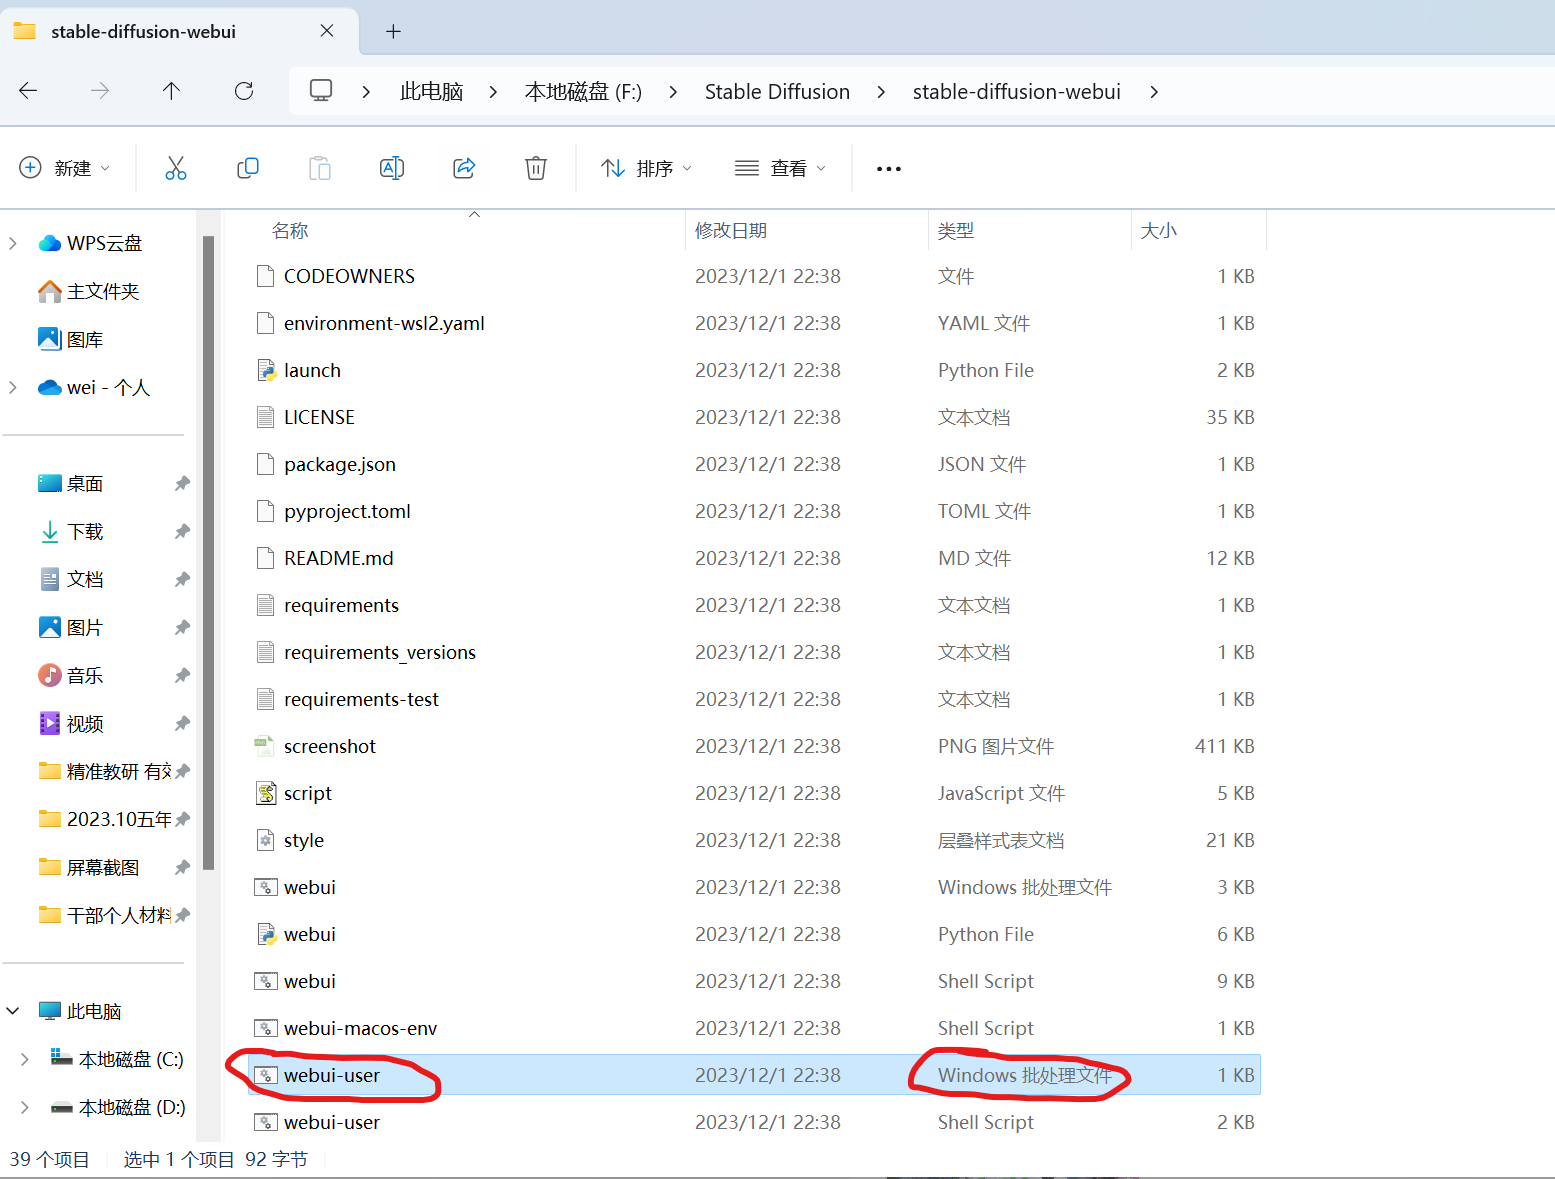
4.执行完成后,在目录中就会多了一个”stable-diffusion-webui“文件夹,打开”stable-diffusion-webui“文件夹,找到”webui-user.bat“文件,双击执行,会再次安装额外资源文件。
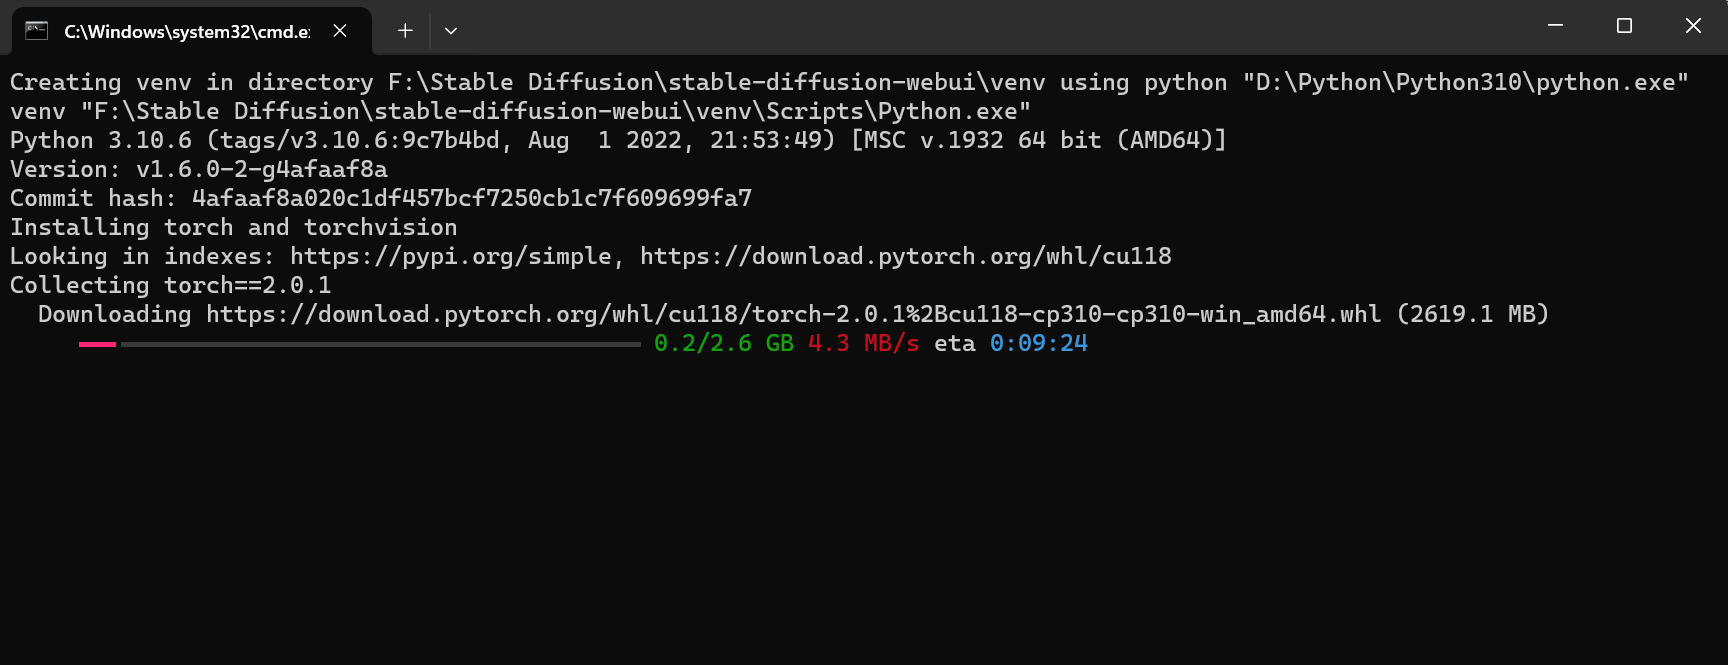
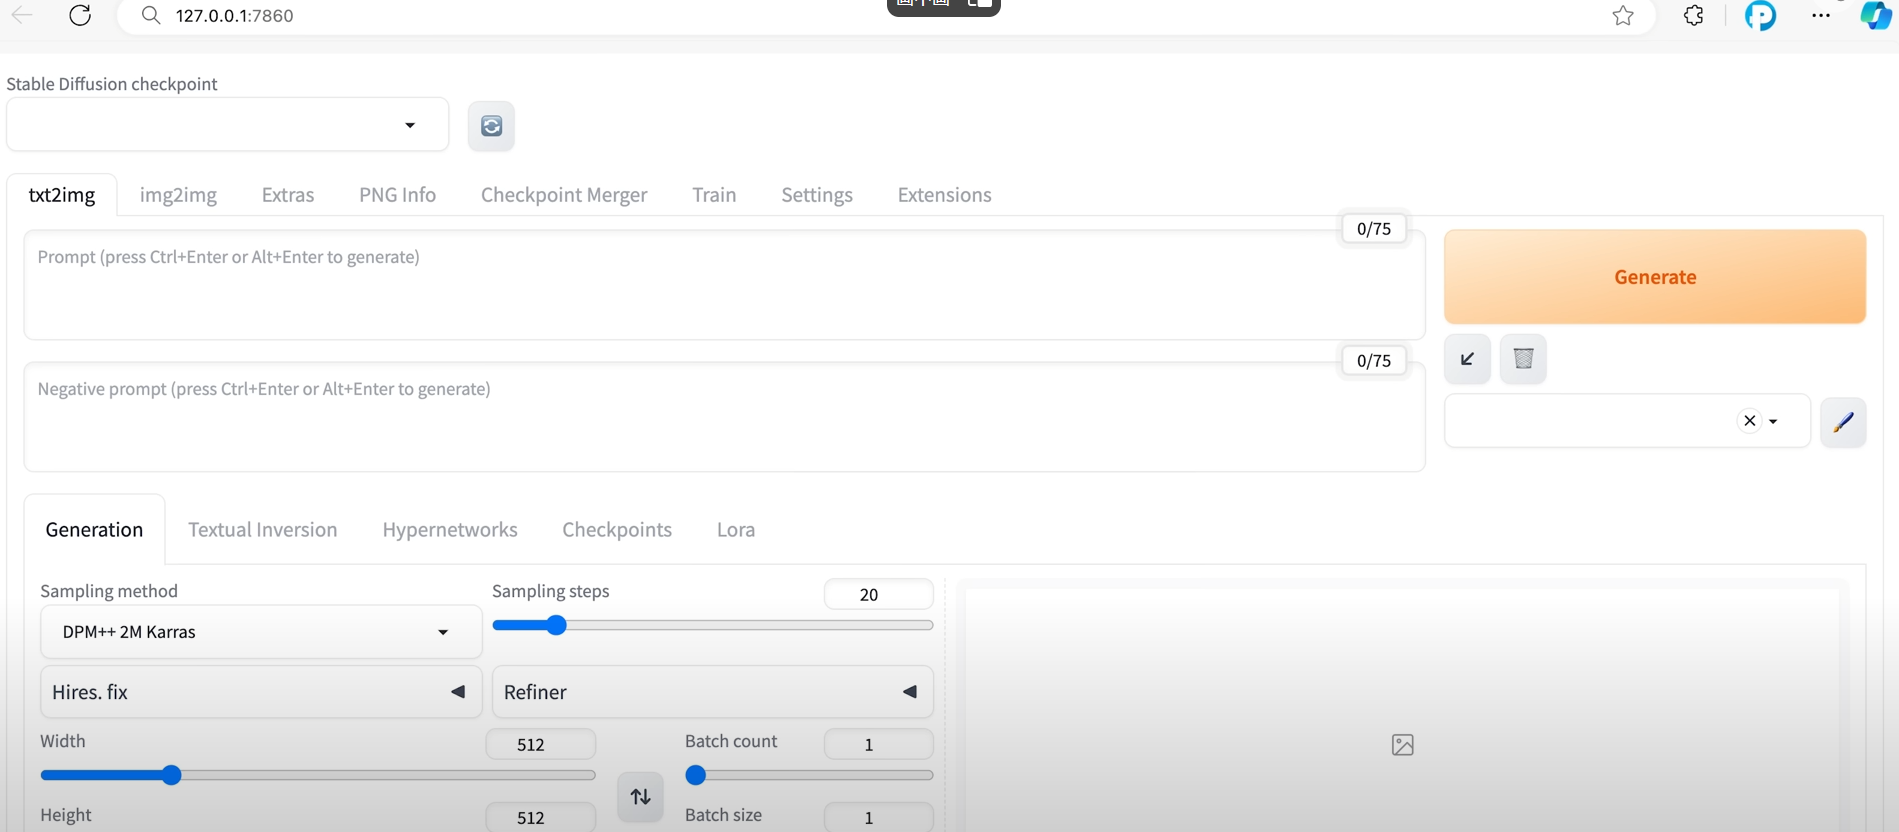
直到完成,会显示地址:http://127.0.0.1:7860
5.将地址拷贝到浏览器地址栏中运行,就可以显示Automatic1111的界面了
6.那么许多玩完要增强绘图的计算能力,他们就会在刚才的批处理文件”webui-user.bat“做一些参数上的修改。如图所示:
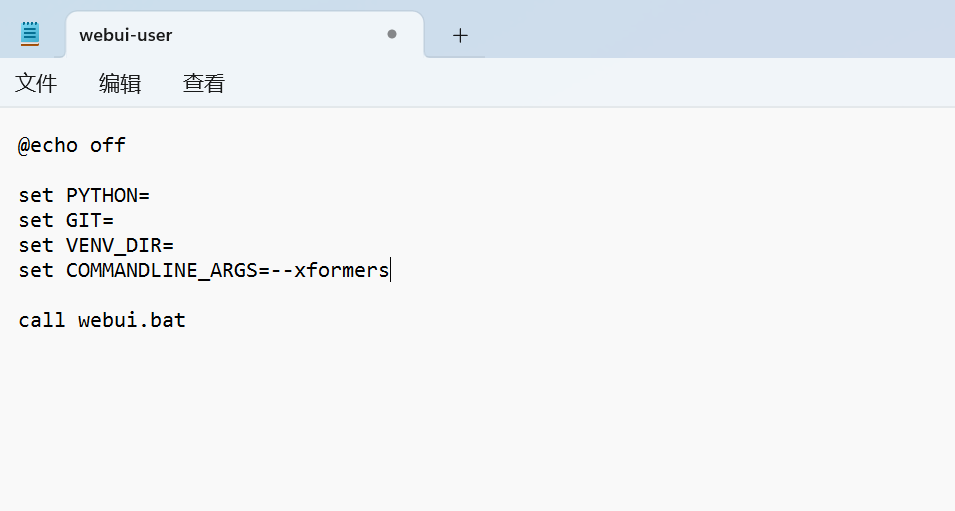
参数:--xformers 用来减少显卡内存的占用
如果需要进行进一步的参数修改,可以参考下面官网上的介绍
SD Webui 官方参数介绍: Optimizations · AUTOMATIC1111/stable-diffusion-webui Wiki (github.com)
Automatic1111 安装流程 (Mac)
Mac安装需要通过HomeBrew软件:Homebrew — The Missing Package Manager for macOS (or Linux)
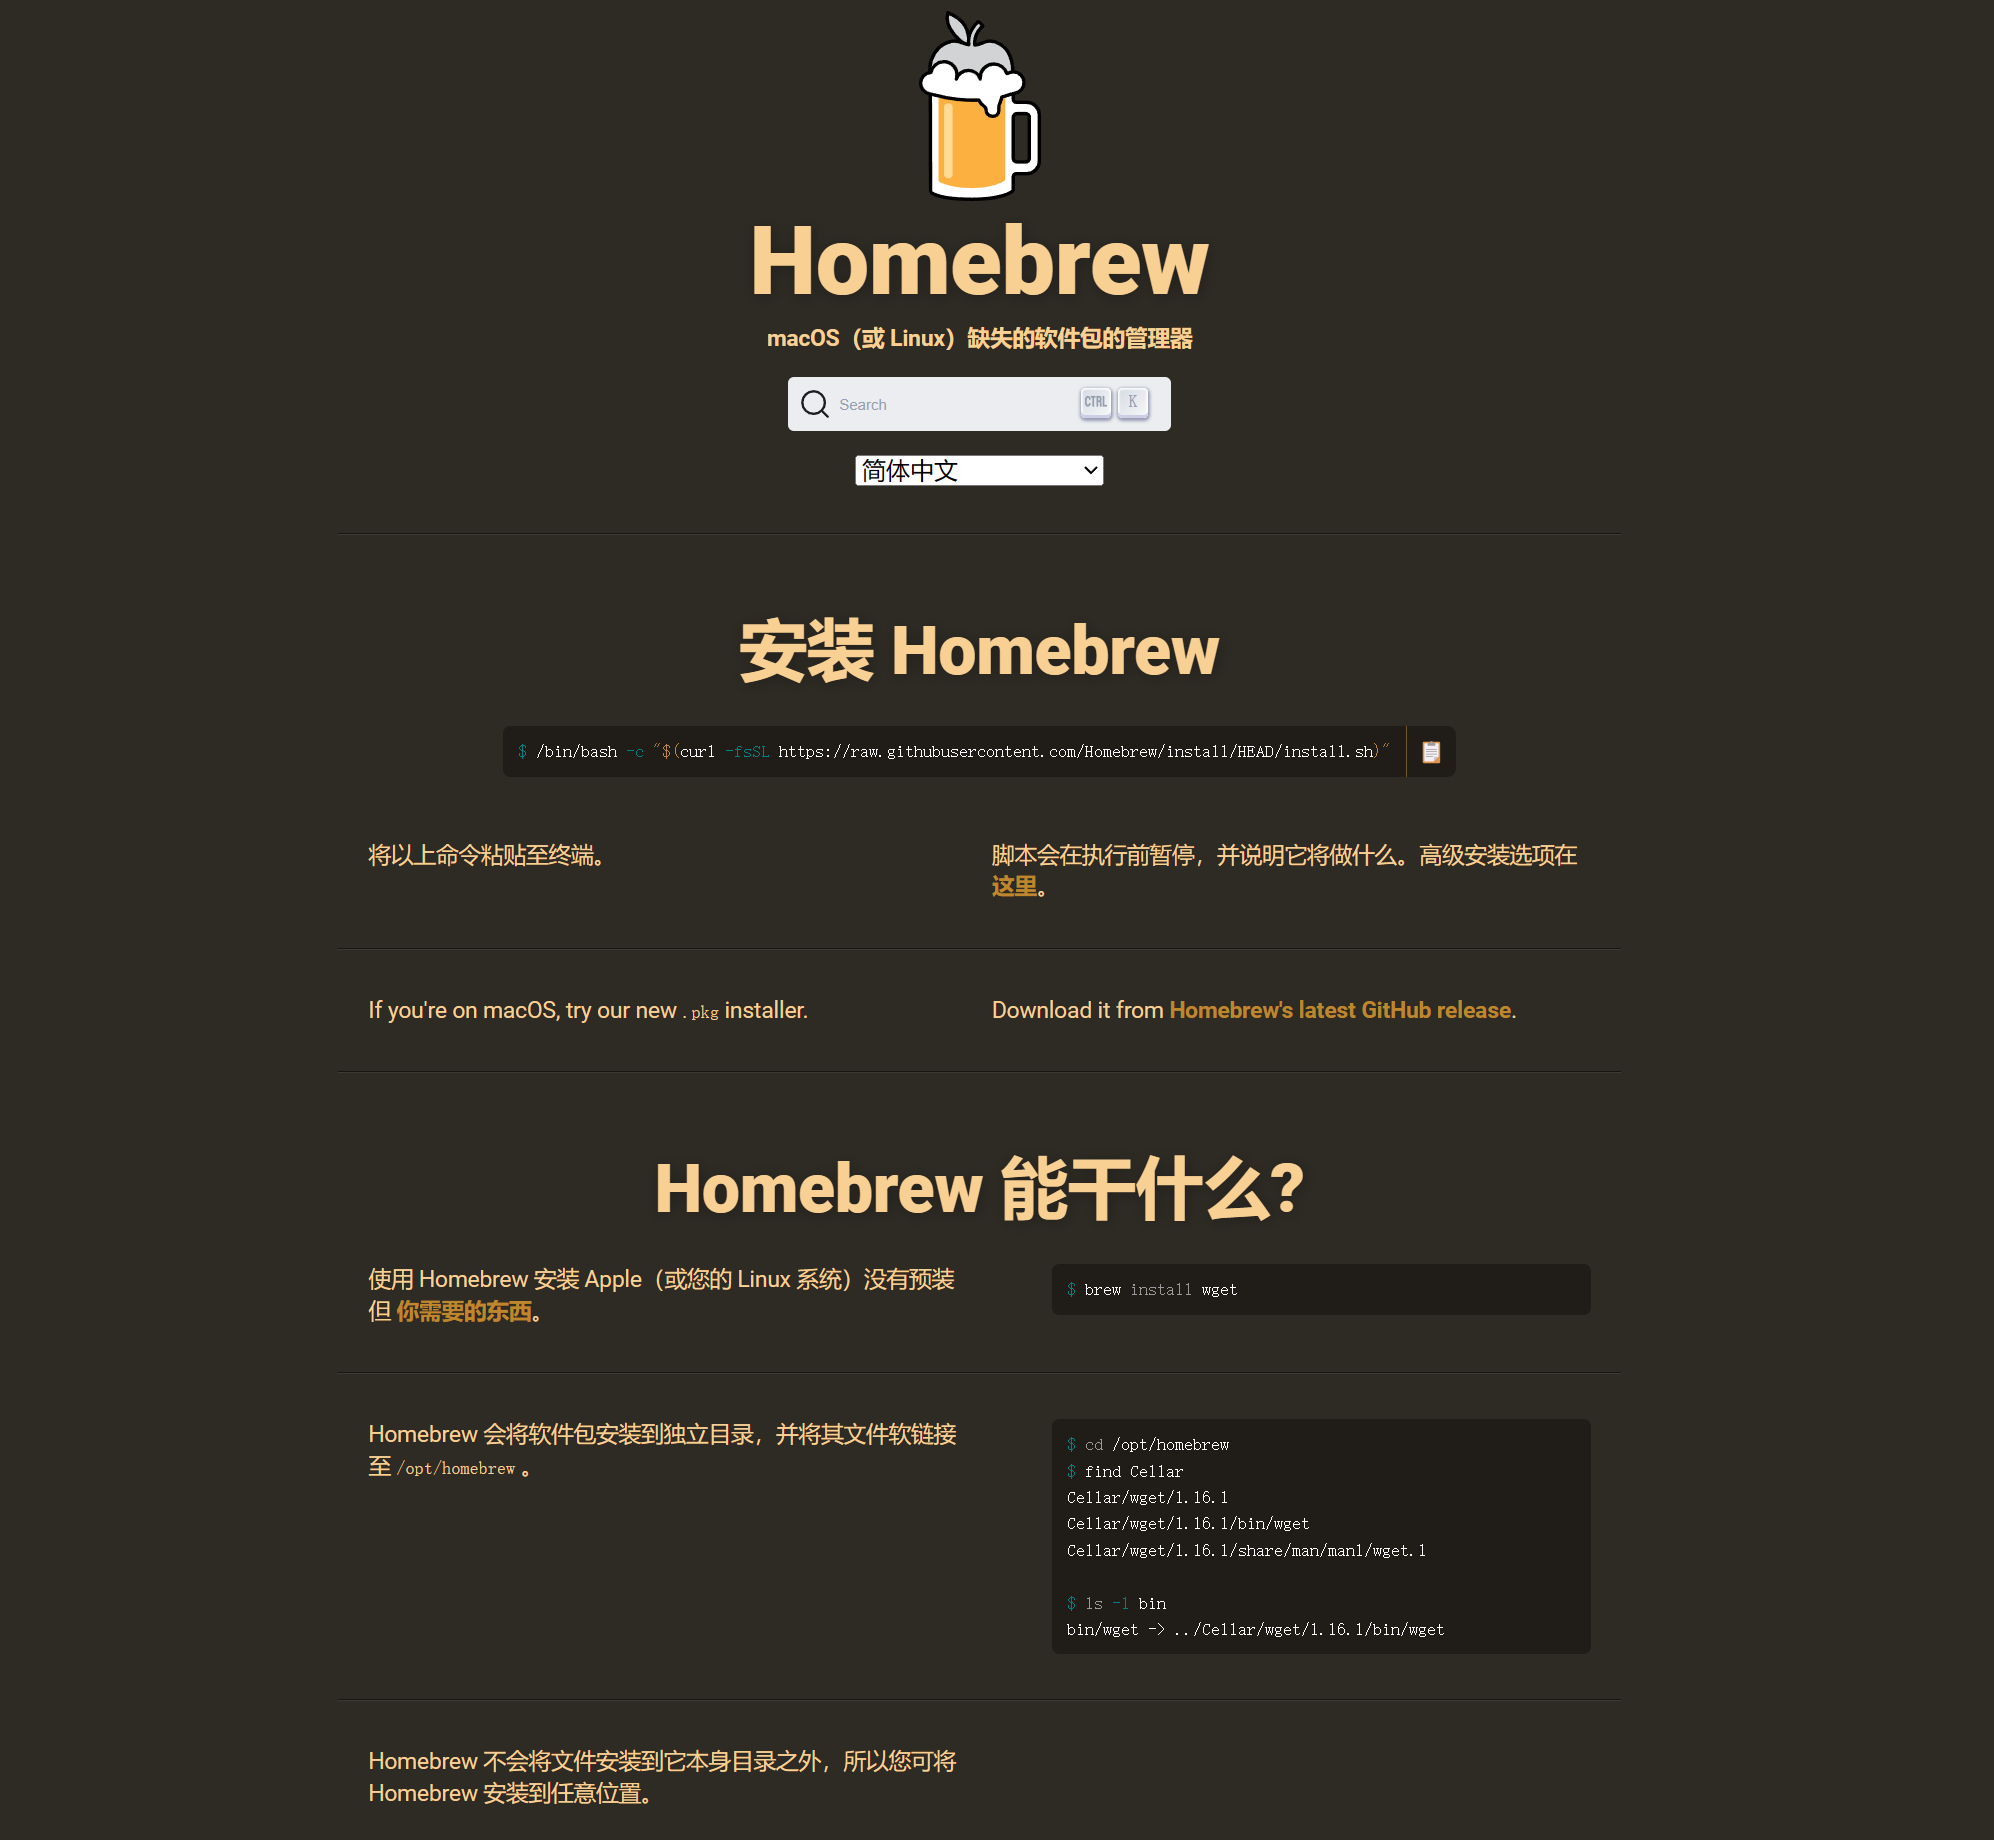
Homebrew首页中有安装命令,我们将它拷贝下来:
/bin/bash -c "$(curl -fsSL https://raw.githubusercontent.com/Homebrew/install/HEAD/install.sh)"
(说明:具体的安装步骤就不写了)
Automatic1111 关闭、重启与更新
1.利用命令进行更新
git pull
Python 安裝指令 (Mac) https://github.com/AUTOMATIC1111/stab...


